JOURNAL | Projects, Events and New Products

  • Leather gets better over time.

    Leather has very interesting characteristics. With time it becomes softer, more malleable, and develops a beautiful patina, or color change.  While you can achieve this affect by beating up the leather and applying an antique stain, why not just wait for it to naturally develop character, and be present during this process?  Its like distressed jeans, it's so much better to know what each hole and paint stain came from then to buy a pair with random distressing.

    No one likes breaking in a new pair of leather boots, or having to shove their cards in a super tight new wallet, but this is a necessary first step to eventually getting the look you desire.  Everything has to be new at one point, and its worth purchasing a high quality product to see it wear in. 

    We attached a photo of the original prototype for the Bill Fold wallet that Steven has been using for the past 2 years.  As you can see, it only gets more beautiful with time, picking up the dyes from your pant pockets and the oils on your hands to develop a dark and smooth patina. 

    Leather has tons of character, so let your leather express itself!

    Continue reading
  • C.S. Osborne & Co Tools: Best tools for Beginers

         It is probably easier than you think to begin leather working, and you will find yourself needing only a few key tools to begin.  Here is the list we came up with of tools that will allow you to begin making leather products, or to continue after taking one of our workshops. Make Smith is excited to announce our new partnership with C.S. Osborne Tools to provide the highest quality tools to use during our workshops, and hopefully inspire future projects.

    TO CUT:  It is always a good idea to have a high quality pair of sheers so that your pattern can be cut out well, with not too much exhaustion to your hand.  We suggest the CS Osborne Leather Sheers. This Heavy weight and serrated edges help prevent leather slipping while cutting.  They are very sharp and accurate so you can cut through thick belting or strap leather. 

    TO CUT A STRAP: If you are looking to specifically cut a uniform strap or belt with thicker leather you will want to use a Draw Gauge. The draw Gauge can be set to widths up to 4".  We use this tool to cut down the side of a cow into 1 1/2" pieces for our Standard Leather Belt, or 3/4" for the handles to our Tote Bag. 

    TO BEVEL: Edge Bevel's are used to round the edge of thick leather such as a belt or strap to dull the sharp edges and give it a smooth and finished feel.  Usually used the step after the Draw Gauge, Edge bevel's come in several different sizes depending on how rounded you want the edge to be.  We suggest using a size #1 on the top, and a #2 on the bottom.  

    TO PUNCH:  Most objects requite holes to be punched in order to assemble. For this, we recommend a Revolving Punch.  This tool has 6 different size setting so you can use it for small holes to stitch up the side of an object, or a larger hole that could be used for a belt. 

    TO STITCH: Align the holes that you punched with your Revolving Punch, and stitch together with a needle and waxed thread for maximum strength.  We suggest using a blunt point Smyrna Needle.  The needle does not need to be sharp because it is going through pre-punched holes, and depending on the width of your thread, it is helpful to have a big eye-hole to thread through.

    And there you go... With this collection of tools and a little research on how each one works, you will be off on your way to make some great leather goods that you will enjoy for years to come.

    Thanks again to C.S. Osborne for providing our classes with the highest quality tools in the industry.  We are excited to share our knowledge with you, and promote some more creativity!  If you are interested in taking one of our classes click here.

    Continue reading
  • Multi-tiered Stool

    Fig Avenue Furnishings is a group of like-minded but pleasantly disjointed furnishing designers & fabricators who work in or near Santa Barbara’s Fig District. What you see below is a multi functional stool, that has shelving under it for storage. We designed it as a  magazine wrack, and blanket in mind for the lower levels. The fabrication and design was done by Steven Soria and Joe Shelton as a commission for El Jardin.

    Website: http://figavenuefurnishings.com/


    Continue reading
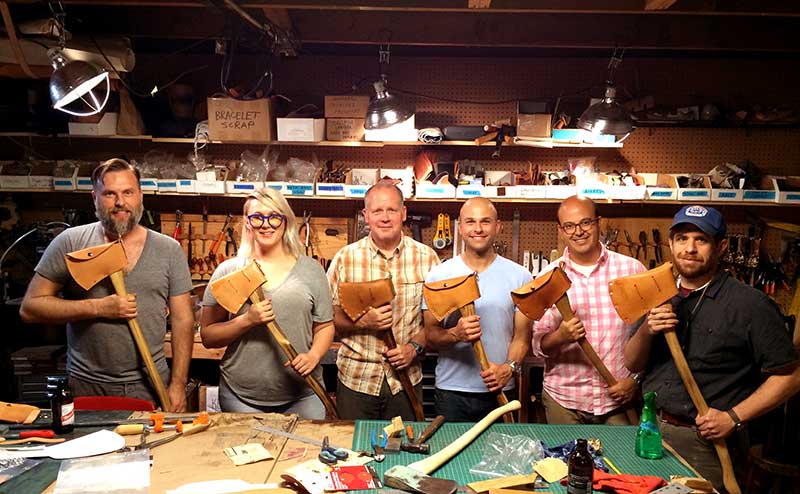
  • 5 Reasons our Workshops are Awesome

    So why should you take one of our workshops? That's easy! Check out our list of reason we think our workshops are so helpful if you are interested in learning more about leather craft:

    1. All of our workshops are beginner level, however one will teach you some advanced skills that are easy to bring home so you can make your own things.

    2.  We give you a list of the tools you need to begin leather working, our secret inside industry suppliers, and how to properly talk about leather (thickness, grain, part of cow, etc...) so that you will succeed with shopping for leather and planning your projects.

    3.  Our classes are usually the same amount as the finished product, so essentially you're just paying for the product, but get to learn how we make it. It's a great value!

    4. The classes are small because our space is small, and there is a better ratio between student and teacher so all your questions can be answered. That means you get a lot of 1-on-1 attention when it comes to the tricky crafting techniques and steps.

    5.  After we spend a few hours with you in a class, we develop a special relationship and are willing to answer questions, and give advice about projects you attempt in the future. 

    So there you have it! The top 5 reasons you should sign up for one of our classes, and come nerd out about leather with us at Make Smith. Check out our classes by signing up here, and signing up for our newsletter.

    Continue reading